
Basic Wooden Frame Directions
If attaching Maslow4 to your floor is not an option, here are the plans for the basic frame that we have been using which has worked well for us. This frame is made from 2x4 lumber which is pretty universally available and affordable. We’re going to show plans for the most basic version of this frame, and then a couple optional upgrades if you want. The materials are listed for US sizes, but very comparable materials exist in metric sizes (ie 18mm plywood instead of 3/4).
Material List
2 count 10 ft 2x4s ($12.68 at Home Depot - They don’t seem to have fir, but it would be fine)
5 count 8 ft 2x4s ($3.28 at Home Depot)
1 box of 1 and 5/8ths inch drywall screws ($7.58 at Home Depot)
2 count sheets of ¾ inch plywood
4 count 3/8ths by 6” bolts ($1.43 at Home Depot)
4 count 3/8ths Tee Nuts
4 count 3/8ths Wing Nuts ($1.38 at Home Depot)


Tools
Drill (With 3/8ths drill bit and fillips screw bit)
Saw (Anything that can cut plywood)
Carpenters Square
Tape Measure
Instructions
1 - Using a saw cut 8x of the corner plates and 12x of the inside plates
Click here for printable templates for the Corner Plate (metric version) and the Inside Plate (metric version). Print this on 8 1/2” by 11” paper or A4 Paper. The exact shape and dimensions of these parts absolutely do not matter. You can cut them by hand without measuring anything if you would like. Note that the circles on these parts are the approximate screw locations and do not need to be drilled.

2 - Stack the corner parts in groups of two and drill a 3/8ths hole in each stack two inches from each edge
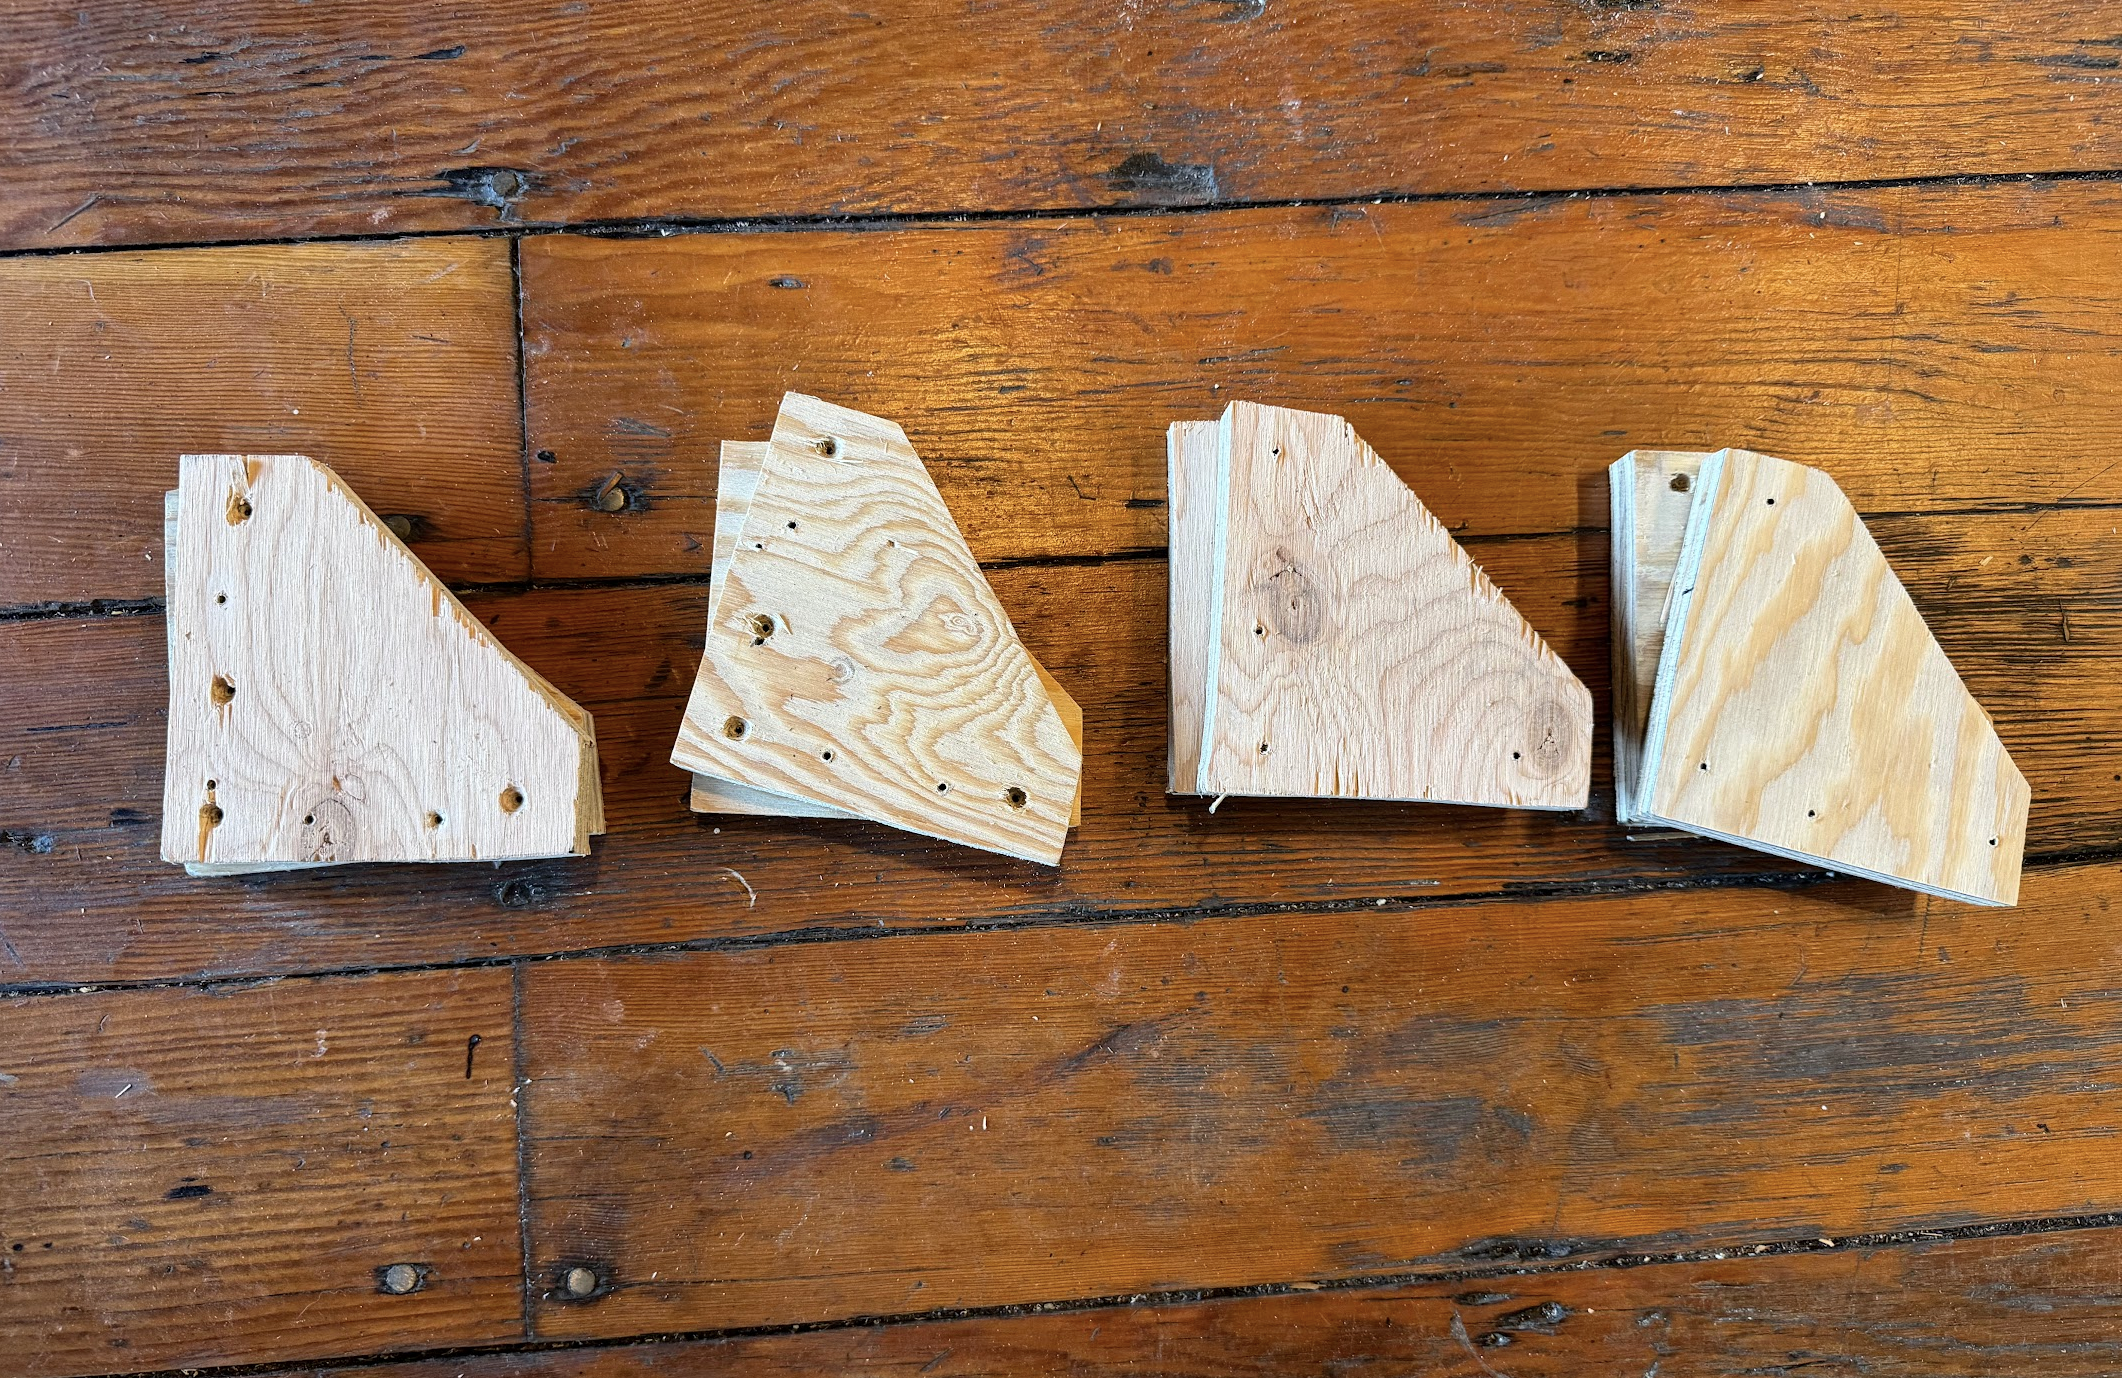
3 - Insert a 3-8ths inch tee nut into one of each pair of corner plates


4 - On a flat surface, layout the two 10 ft 2x4s parallel to each other roughly 8 ft apart. The 2 inch sides should be facing up.
Place one of the corner plates with the tee nut installed under each end and then place an 8’ 2x4 between them on each side.

5 - Layout the five 8 ft 2x4s between the 10 ft pieces perpendicularly. The 2 in sides should be facing up. There should be one at either end to create a rectangle and three evenly spaced in the middle.
The exact spacing of these braces is not critical. Here is an illustration of the recommended spacing, but if your lumber is a slightly different length do not worry. What we are going for is a roughly even spacing.

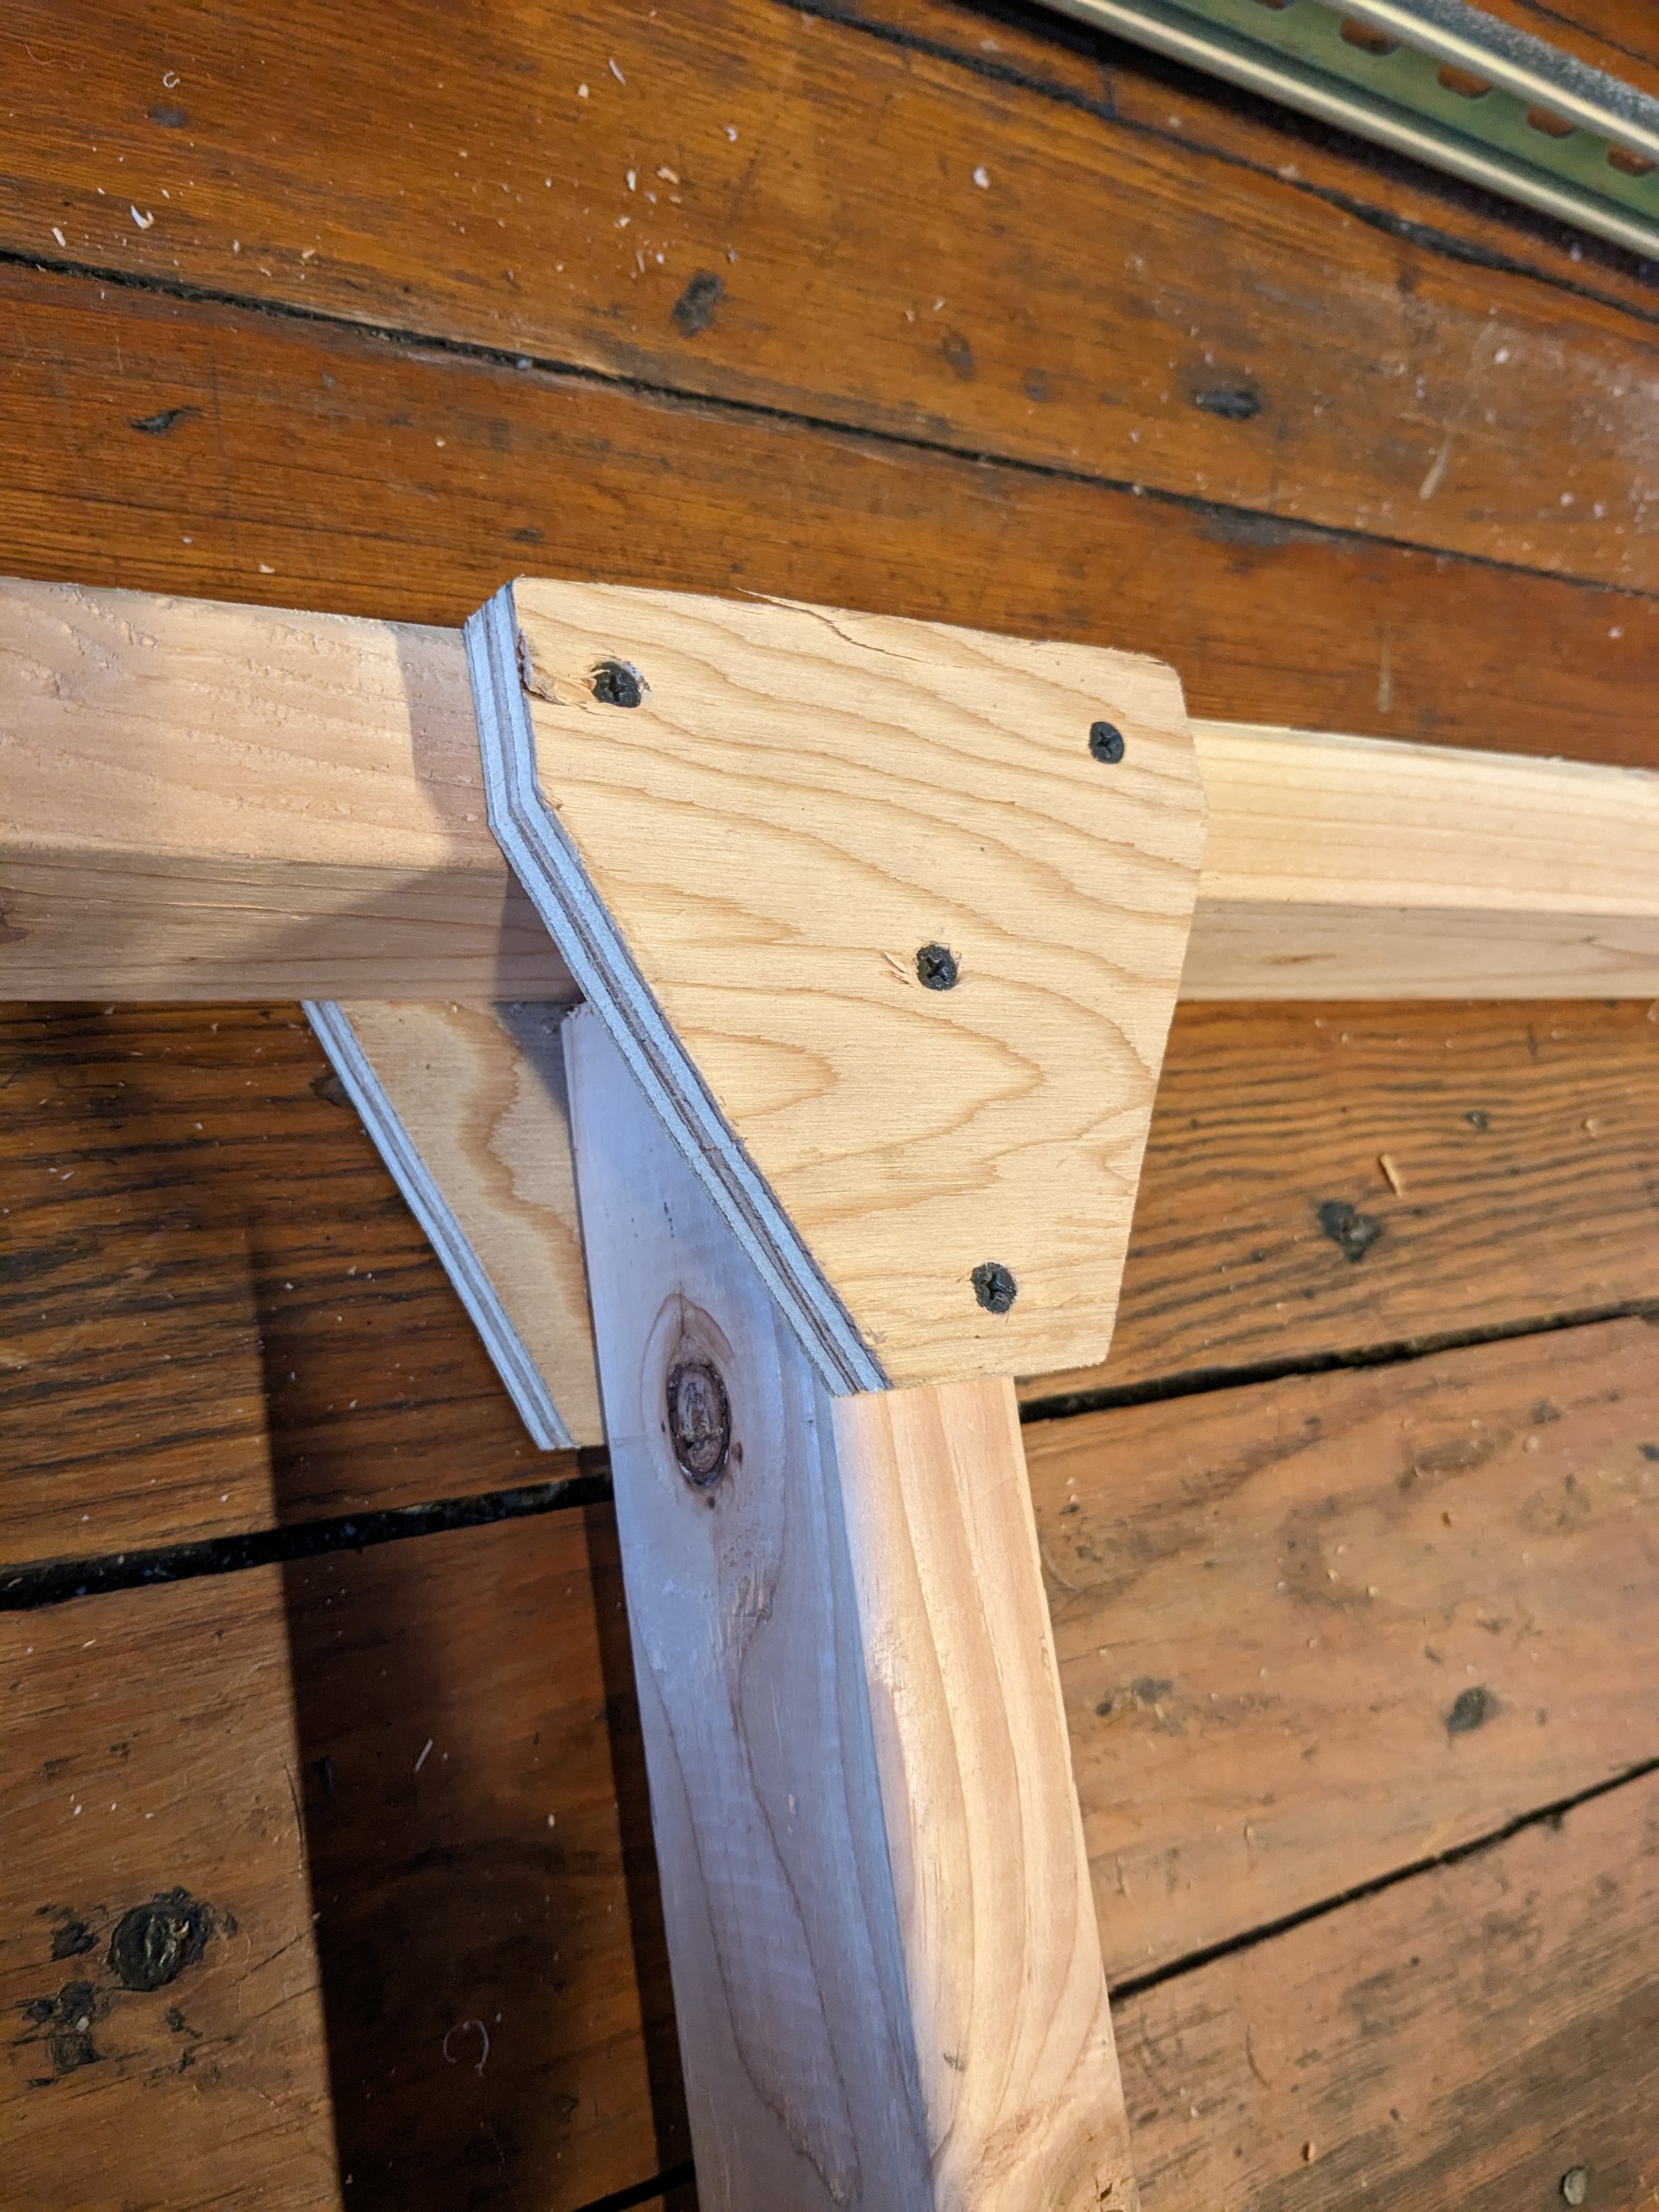
6 - Using a carpenter's square to make sure the corners are roughly 90 degrees, screw one Corner Plate to each corner of the frame. Use 2 screws for each 2x4 following the layout shown in Detail A. Each plate receives 4 screws

7 - Using a carpenter's square to make sure the 2x4s are roughly 90 degrees, screw one Inside Plate to each intersection of 8ft and 10ft 2x4s. Use 2 screws for each 2x4 following the layout shown in Detail A. Each plate receives 4 screws
8 - Flip the frame over so that the newly attached plate are facing down
* Tip: Please ask someone to help with this part. This thing is big and awkward to move.

9 - Screw one Corner Plate to each corner of the frame. Use 2 screws for each 2x4 following the layout shown in Detail A. Each plate receives 4 screws
10 - Screw one Inside Plate to each intersection of 8ft and 10ft 2x4s. Use 2 screws for each 2x4 following the layout shown in Detail A. Each plate receives 4 screws
11 - Center the remaining piece of ¾” plywood in the frame to create a spoil board..

12 - Screw the plywood to the 2x4s underneath using 2 screws per 2x4, one on either side of the plywood board. There will be 6 screws in the spoil board in total.

13 - Thread the 3/8ths inch bolts through the frame and into the tee nut. Then flip the frame over and thread the bolts all the way through so that they protrude.
These will server as the anchor points for the machine.

14 - Done! Modify as needed.
This is a rough guide to make a frame. If you have room you can use 12’ 2x4s to get even better performance or you can make your frame smaller if needed. Maslow4 is designed to work with any flat rigid surface so a lot of variation is possible.
Optional Upgrades
A 3D printed belt end anchor for bolts or pins can be screwed to the corner plates
You can find a 3d printable file for our quick release anchor point here.
Add cross bracing with a gate kit to increase frame rigidity
Suspend the frame on hooks or pulleys for storage